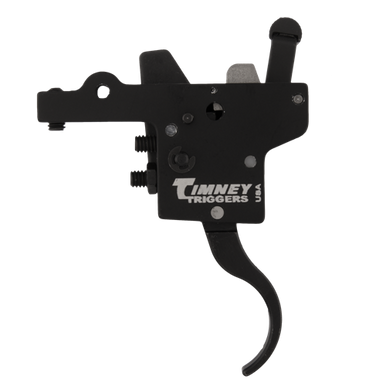
I can't find the site I remember seeing years ago, but these instructions are for the Finnfire and should get you started. They can be found at:
www.sako.fi/pdf/manuals/sako_finnfire.pdf (requires free Adobe Acrobat Reader)
Standard trigger instructions from page 12:
[screw #1 is in front of the trigger. I couldn't copy the diagrams. JBT]
- The trigger has no first pull and the trigger pressure is set at the factory to approx.
15 N.
- Both the sear engagement and safety are set at the factory and need no adjustment
of any kind.
- Should you wish to alter the trigger pressure, the stock must first be detached.
To do this, remove the trigger guard fastening screws.
TRIGGER ADJUSTMENT (Fig. 6)
- The trigger pull is adjustable from 10 N to 20 N [about 2 to 4 pounds. JBT] by means of the screw 1.
- Turning the screw clockwise will increase the pressure. Turning the screw
counterclockwise will reduce the pressure.
NOTE! FOR SAFETY REASONS DO NOT ATTEMPT TO REDUCE TRIGGER
PRESSURE BELOW 10 NEWTON (2 LBS).
The safety is permanently adjusted at the factory. However, if the trigger, trigger
sear or safety lever has to be changed, the safety must be readjusted. For this
operation the trigger mechanism must be returned to the factory in Finland
Single set trigger instructions from page 12:
[screw #1 is in Front of the trigger; #2 is behind the trigger]
SINGLE-SET TRIGGER MECHANISM
For use as a normal single-stage trigger, squeeze rearwards in the normal fashion.
The trigger can also be "SET" by pushing the trigger forward until it stops.
The rifle can now be fired with only a light touch. WARNING! WHEN THE TRIGGER
IS IN THE "SET" POSITION, THE RIFLE MUST BE HANDLED WITH
EXTREME CARE, AS ANY SHOCK OR VIBRATION CAN DISCHARGE THE
RIFLE. If the rifle is cocked, with SAFETY ON, the trigger CANNOT be put into
the "SET" position. To return trigger to the "UNSET" position, the safest method
is to put "SAFETY ON" or open the bolt. NOTE! When the safety is in the "ON"
position it locks the trigger mechanism and the bolt. The rifle can be cocked only
when the safety is in the "OFF" position.
TRIGGER ADJUSTMENT (Fig. 7)
The trigger mechanism is constructed for 10 - 20 N (2 - 4 lbs) trigger weight in
single-stage position. The trigger weight is adjusted to 13 - 15 N (3 lbs) at the
factory. To be sure that the single-set trigger operates correctly in all circumstances,
the trigger weight should not be increased. The trigger weight can be
adjusted by the means of screw (1). Turning the screw clockwise will increase
the trigger weight. NOTE! Screw (1) is self-locking and needs proper tool.
SET-TRIGGER ADJUSTMENT (Fig. 7)
When the trigger is in the "SET" position, the trigger weight is 2 - 2.5 N (7 - 9 oz.)
and cannot be adjusted. The screw (2) adjusts the gap between the trigger and
the plunger of the trigger weight spring. This gap affects the creep in unset stage
and should be as small as possible, preferably the screw should lightly touch the
plunger. On the other hand if the pressure between the screw (2) and the plunger
is too heavy, it may prevent the set-trigger from working. NOTE! Screw (2) is
self-locking and unnecessary adjustments should be avoided to keep the selflocking
in good condition.
SAFETY ADJUSTMENT
The safety is permanently adjusted at the factory. However, if the trigger, trigger
sear or safety lever has to be changed, the safety must be readjusted. For this
operation the trigger mechanism must be returned to the factory in Finland.


