Rimfire Central Firearm Forum banner
  • Whether you're a greenhorn or a seasoned veteran, your collection's next piece is at Bass Pro Shops. Shop Now.

    Advertisement

My kinda Project--34

30K views 123 replies 34 participants last post by  aqbill  
#1 · (Edited)
August 5, 2009. This project grew and grew, probably the most in-depth how-to I've ever done. If you guys are looking for one way to revive and enhance an old worn-out and seemingly hopeless gun, this thread will show you how. The only prerequisite to investing the time and emotional interest in such a piece is that it be mechanically sound on the inside, no matter how it looks on the outside. Pay particular attention to the most neglected inspection rarely done--check the barrel for rings and bulges before you commit!
~~~~~~~~~~~~~~~~~~~~~~~~~~~~~~~~~~~~~~~~~~~~~~~~~~~~~~~~~~~~~~~~~~~~~~~~~~~~~~~~~~~~~~~~~~~~~~~~~~~~~~~~~~~~~~~~~~~~~~~~~~~~~~

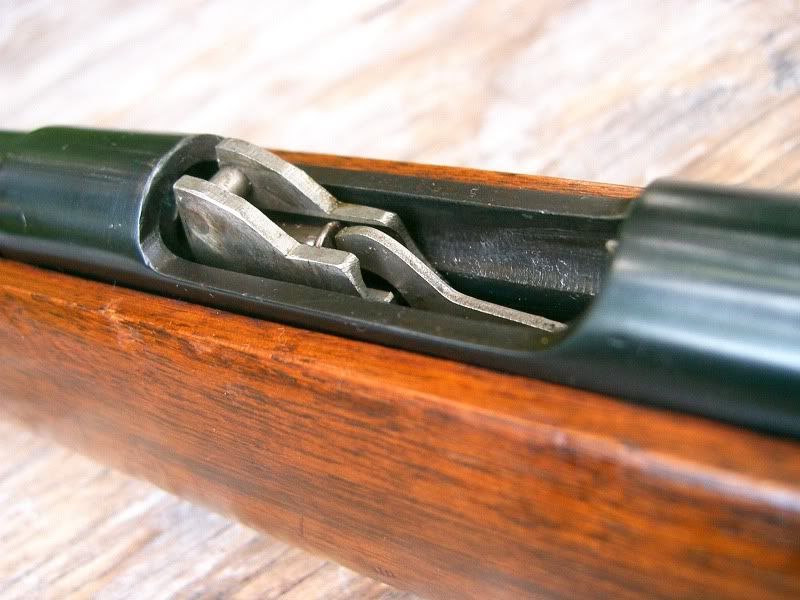
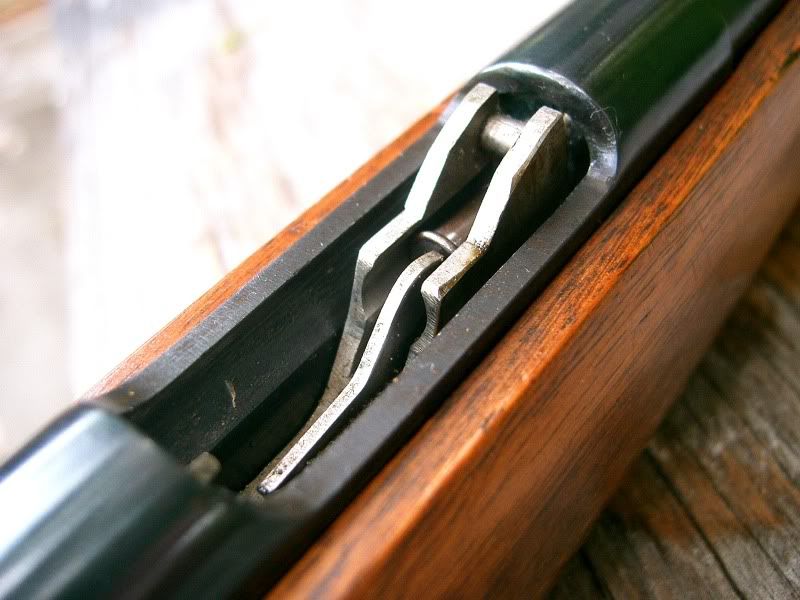
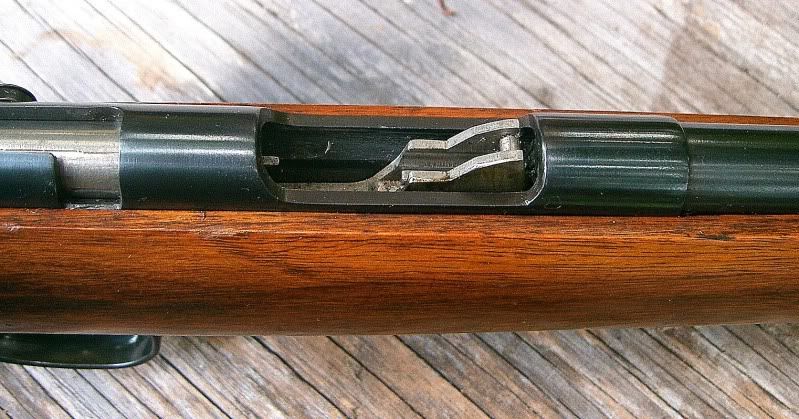
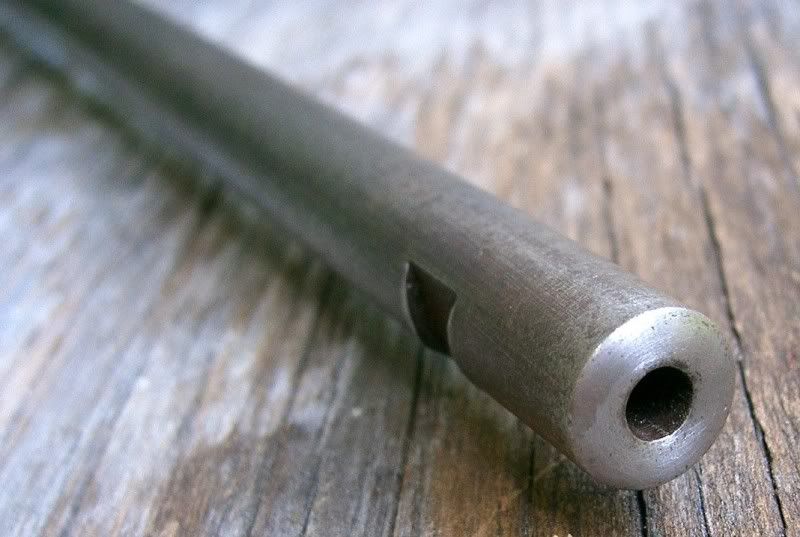
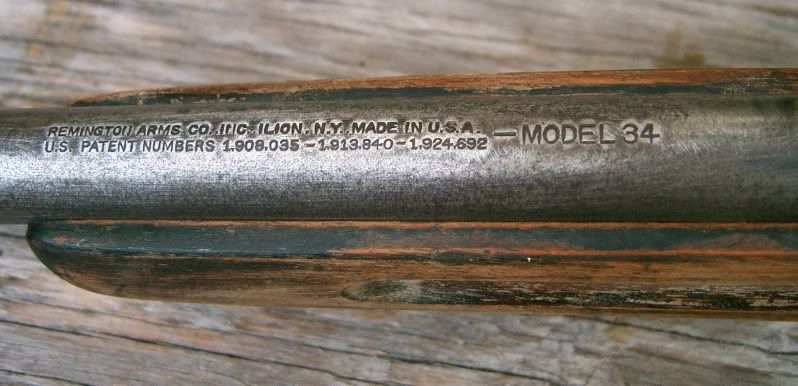
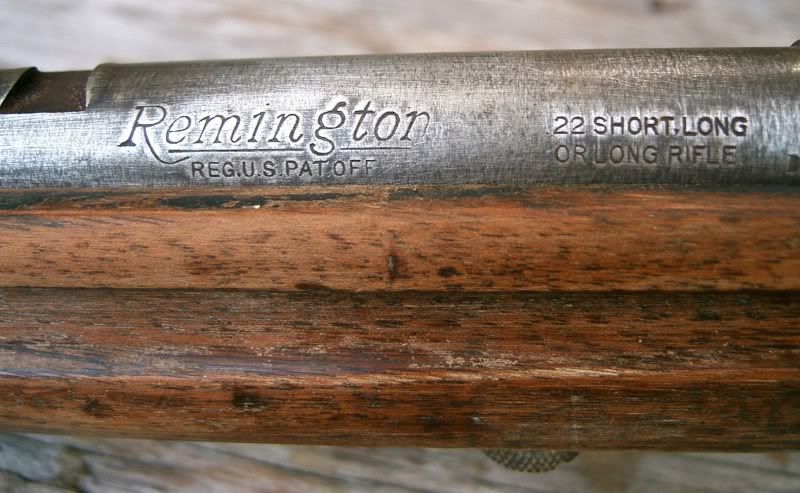
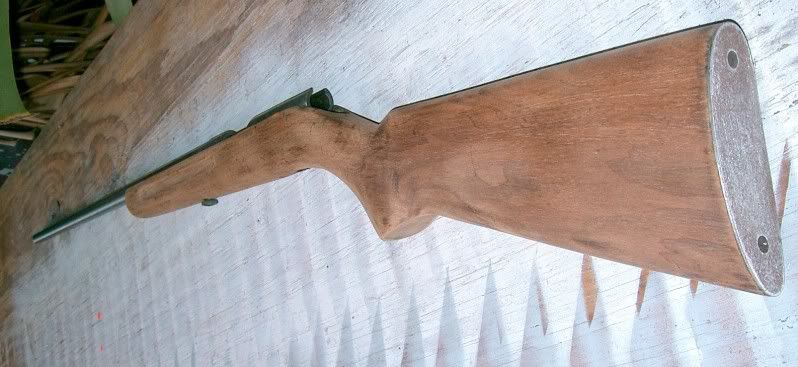
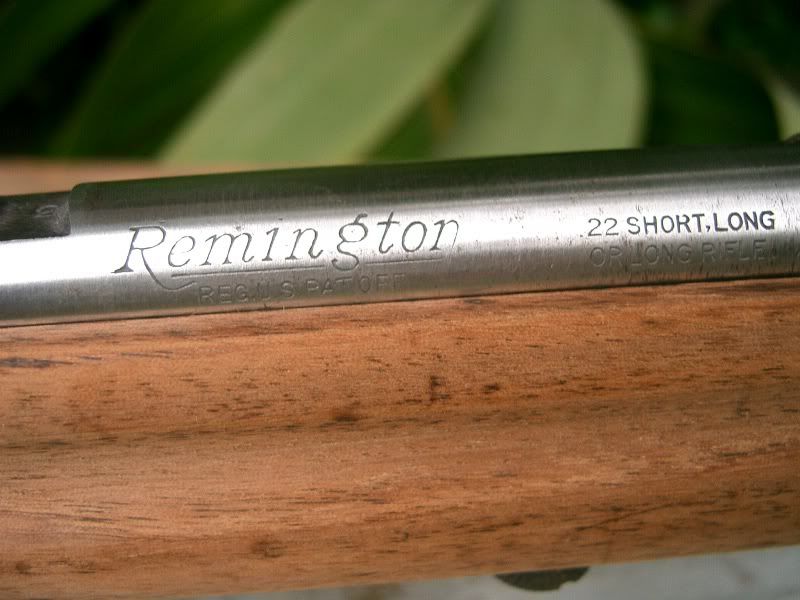
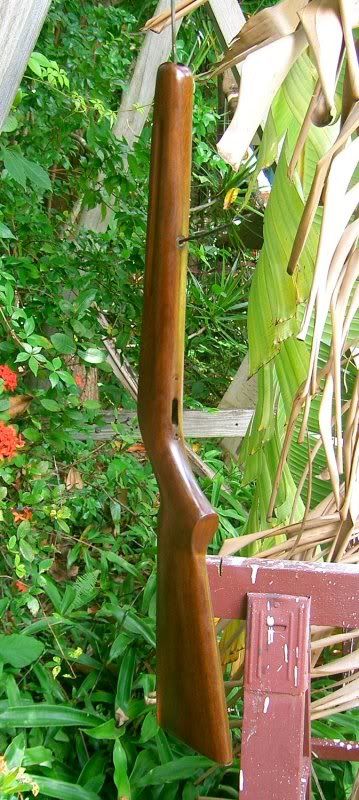
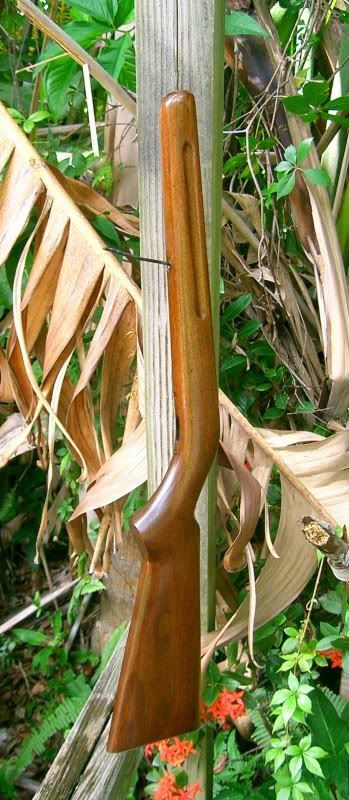
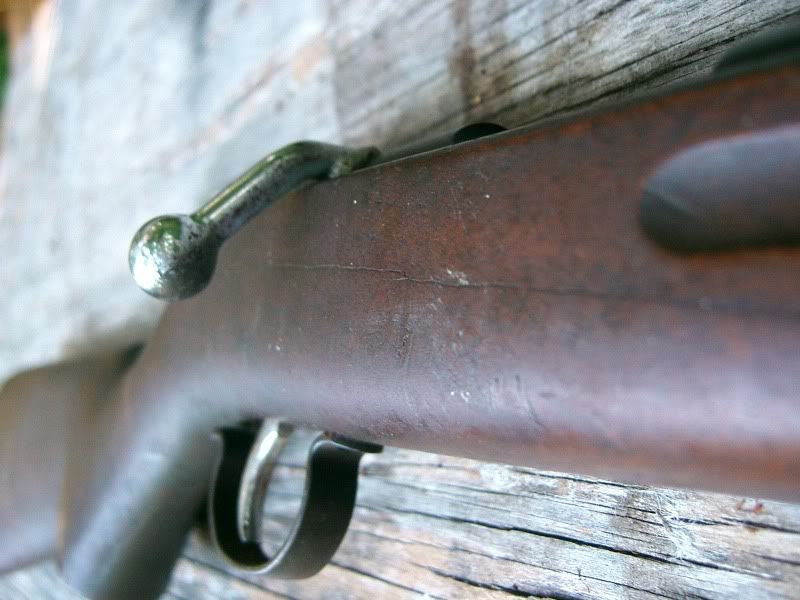
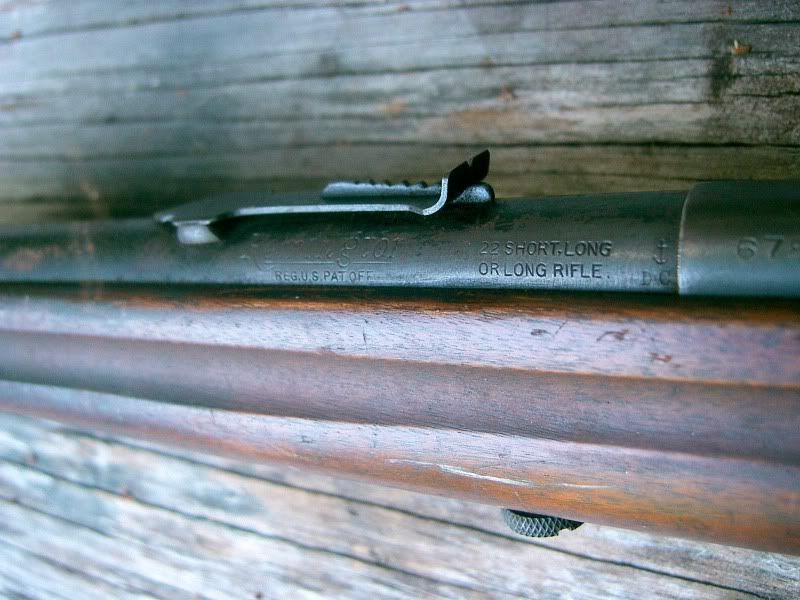
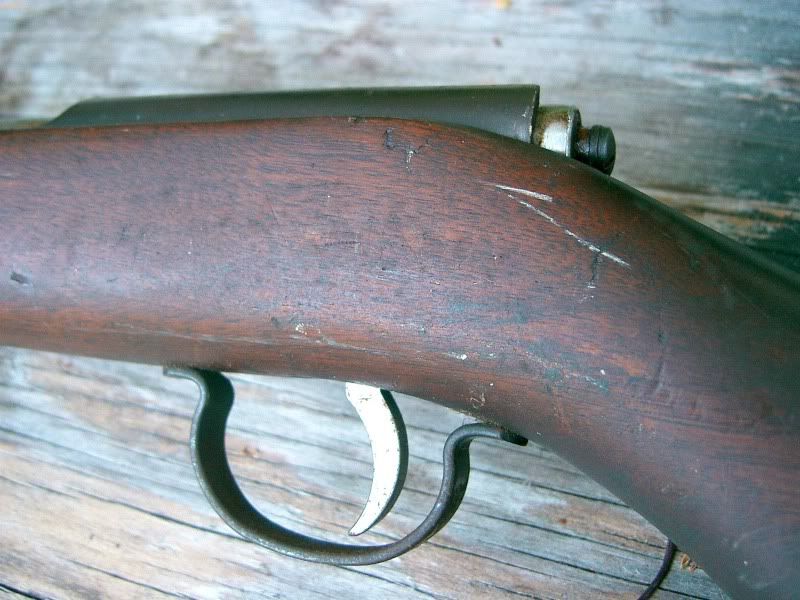
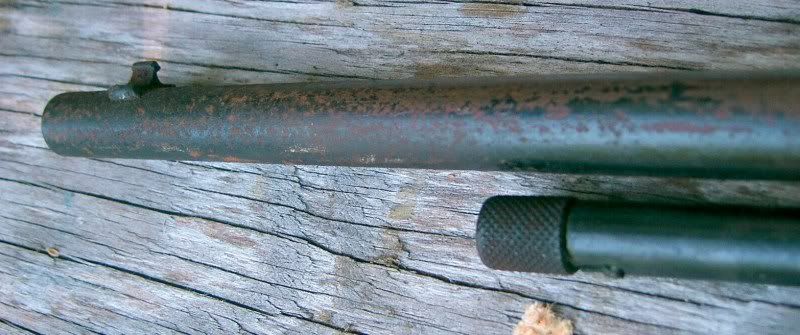
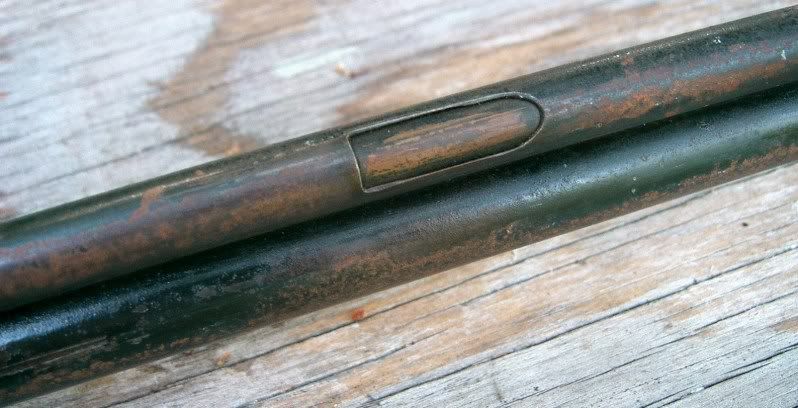
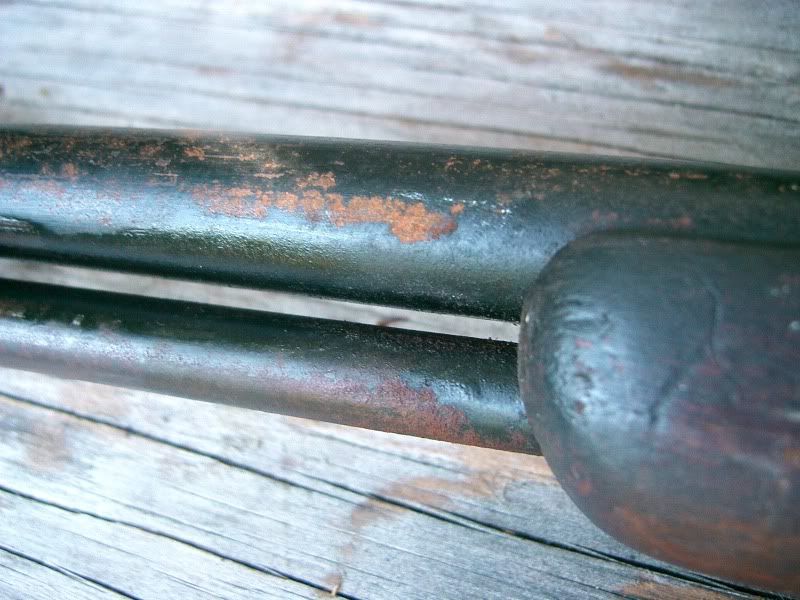
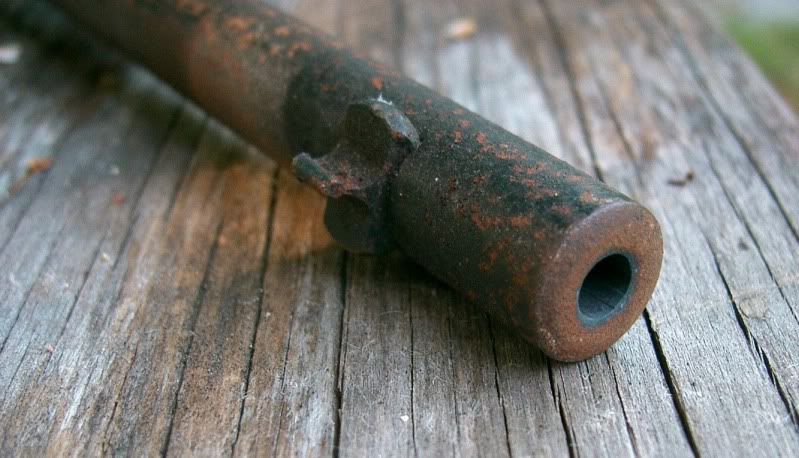
This gun has just found its way into my pending basket and has it all--mechanical soundness, great lines, cracked stock, perfect bore, and a built up equity of neglect. Most seasoned guys in the crowd will take one look at this erstwhile 22 and think, correctly, "hmmm, damp dark closet queen for the last 15 years". That's about where I figure it lived, minus any oil, for at least that amount of time. I consider such a rifle to have a little too much character and will slowly rebuild it from scratch using my self-taught methods. I took it out yesterday and after removing the spiders and dust from the barrel so I could see if it still had any rifling, found that it shoots like a dream-- smooth action, love that cartridge feeding system, and nice trigger. Just butt ugly at the moment. That will change over time, I intend on doing this at my leisure, and will report as I go along with illustrations.
Image

Image

Image

Image

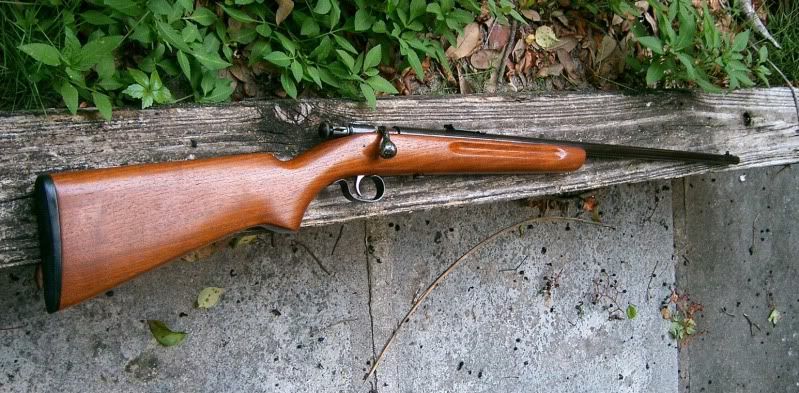
DUDE. Throw this one away already, it's too late!!!
Image
 
#3 ·
Yes I'd agree with the "rough" description....

...but diamonds start out that way too. I'm still looking here in NZ for a 34 / 341, so would settle for a rifle that worked. That said, I'm of the opinion that its a good pick up and you'll probably have a lot of fun sorting it out to your satisfaction.
I do have a question about the feed mechanisim. Everyone says its interesting, and once you see one you'll buy the rifle. I'm intrigued, having never seen one, has anyone got a link to some pics or a drawing? Unfortunately I don't have Mr Gyde's & Mr Marcot's book.
cheers
 
#4 ·
I'll take some pics shortly of the feed elevator lift, it's more like a dumbwaiter :) .

Disassembled the rifle today, there is surprisingly little pitting underneath all that rust, and none in the crucial areas around the model number and manufacturer rollmarks. So the resuscitation of the metal texture will be both minimal and thorough. I do plan on rust bluing the gun however, because A) that's all the gear I have to hand, and B) I like the grayish-blue look. Very durable.
 
#6 ·
Flystoomuch,
I just picked it up off PAL's garage floor thursday. He and the tall lawman made a haul somewhere, and this is the diamond of the bunch ;) . They figured it was right up my alley, the price was right (free), and they figured correctly that I'd adopt it and raise it up to be the second incarnation of a fine rifle. With your 341 I am now complete--two dumbwaiter-fed Remingtonians.
 
#11 ·
Woodwork?

Anybody know if Remington used other woods than walnut? This one has the density, smell, and sandability of walnut, but is the plainest stick and grain I've come across in some time.
Image

Getting there with the polishing, not quite finished
Image
 
#14 · (Edited)
I am undergoing an internal debate regarding just how far to take the sanding. It turns out that even the micro-pits the rifle has, while small in diameter, are deep into the metal in a few places, and I am not particularly interested in grinding away on the steel for the next six months! Not ready to say enough yet, but again unwilling to mar the rollmarks. Rust bluing will not hide little stains like the dip bluing method, which is a black coloration. For now unwilling to commit, and so will grind away a little bit more each session till I have had enough. Like anything getting a final coat, the beauty is in the preparation.
 
#15 ·
I would be very interested in a sentence or two on each step as to the, material used, what grit, and method used. It is very obvious your experienced as well as good at this. Always nice to learn a thing or two from someone that knows.
It is fun to see the progress, thanks for sharing.

The 33's we have, especially one, seem to have very straight wood grain. Perhaps Remington used different sources for wood back then.
 
#16 ·
Great project gun and pics AGS22!

I'd agree with rem33, a few more details would help those of us with "rimfire rescues" to start on our project guns.

I think a little dimpling in the restored gun will be a subtle reminder to you of just how far this gun has come! :bthumb:
 
#18 · (Edited)
Walnut in sunlight...

~~~~~~~~~~~~~~~~~~~~~~~~~~~~~~~~~~~~~~~~~~~~~~~~~~~~~~~~~~~~~~~~~~~

Today I prepared the stock by sanding it from 120 up through 220 grit, about half an hours' worth, stopping when I reached a uniform coloration of the wood. Then I used a large cotton patch to apply Pilkington's Winchester Red/Brown stain, two coats, to make the wood take on the classic look of the '50's American walnut rifles. Cut my usual Pro Custom Oil finish back 50% using mineral spirits, and brushed on a first coat. Left it on for three minutes then wiped it off with an old cotton rag (no lint) to prevent dust motes from adhering. I left the stock hanging outside away from dust for an hour. I still don't think this is walnut. Tomorrow, after curing all night, and after I watch the best stage of the Tour de France, I will apply another diluted coat of finish after rubbing the first one out with OOOO steel wool and removing the wooly whiskers. You must must must remove all loose particles from a stock after any sanding/rubbing/buffing and before applying finish. And this includes the inletted insides of the stock. If you don't you'll find out why.

Always leave the buttplate on the stock when sanding, otherwise you'll round the edges off.
Image

Image

Both of these products are available from Brownells, I have used them for decades with success. Use latex gloves when applying that stain!!!!!
Image

Glad you guys take an interest, my chief aim on this project is to show that any gun not actually damaged, can be brought back to a thing of beauty.
 
#96 · (Edited)
I kinda breezed over the woodwork on this project, as I am so familiar with doing it and have done threads on wood many times. Also, the emphasis here was on metal, but I need to add some more info for some of you interested readers, and myself, just for the heck of it and I am enjoying building up this thread even more :cool: .....

~~~~~~~~~~~~~~~~~~~~~~~~~~~~~~~~~~~~~~~~~~~~

Always leave the buttplate on the stock when sanding, otherwise you'll round the edges off.
Image

Image
Here are some pictures to illustrate the difference between sanding with and without that buttplate attached. Got a hold of a buddy's Winchester 67 today for some cleanup work, the gun's been refinished before. The finish is a terrific duplicate of that classic '50's look, but unfortunately the buttplate was taken off during the sanding step. You can see the rounded shadow on the wood where it meets up with the plastic buttplate...
Image

... and here you can see the gap/overhang of the plate against the wood as a result.
Image

Plus a side shot of same rounding at wood and plate, showing the little "trench" between the two parts
Image


To contrast, here you see a factory original fit and finish on a 9422 XTR. There is no real gap between wood and plastic, just one continuous plane.
Image

Image

Image

It is quite common to see a new rifle where the squared rear wood edge actually is higher than the buttplate. This may just be shrinkage of the plastic plate in come cases, but is very common. Collectors watch for this and the same 'proud' wood around the tang area, standing up above the metal receiver. As long as the wood edge is squared off, it usually indicates a rifle that has not been worked over and/or sanded.
This little refinishing detail is a small thing, but one that makes a visual difference, and shows where a guy stands in the rifle resurrection universe. These details add up!!!!! Still, this is a nice overall job by a first-timer...
Image
 
#22 · (Edited)
Here's the setup for boiling the barrel and receiver--iron tank, propane, and a broomstick with two drilled holes approximately the length of the barrelled receiver. Ideally the flame should be run under the entire tank end to end, but this is my easy rig that has worked entirely satisfactorily for about 15 guns. A soft iron wire runs through the bore, and the thoroughly degreased rifle is suspended off the bottom about an inch. Cannot touch bottom.
Image


This tank will be filled to just above the works with distilled or de-ionized water, and brought to a boil. Look closely and you can see the front of the barrel changing to a brownish-rust. I left the barrel in the tank with that small amount of water in the bottom just to spike the humidity.
Image

Image

Closeup showing how the rust bluing chemicals are beginning to turn the metal. For the first coat only, Pilkington says to wait an hour, then recoat again. Then wait three hours and boil for ten minutes, followed by a thorough hairdryer treatment to get all the water out. You can't tell here, but the moment I applied the rustblue, the shiny metal started turning a dull bluish-gray. You do not slop it on, the cotton shouldn't be dripping just damp. No puddles or you will leave spotting.
Image
 
#25 · (Edited)
The stock is finished and curing on its hook.

I boiled the barrel/receiver this morning (along with some eggs and toast) and recoated for the second go round. This usually takes about 4 times through before the mix quits turning darker. Each time through I leave a little longer to rust up.

The kettle's on the boil...I swing the barrel back and forth in the water to 'stir' it, and babysit the works for ten minutes.
Image


Barrel after first boil, and second rustblue just applied, a little darker...
Image


Another picture of progress...second coat of rust blue starting to rust up
Image


Incidentally, it is not until you oil the metal like crazy at the end that the real darkness comes out. The oiling is the most rewarding part of the job as you see the beauty of the metal emerge. This rifle is going to be the beneficiary of Eezox. This is the best rustproofing oil I know of, but the real way to apply it for maximum benefit, and as it says in the directions, is to thoroughly remove/degrease all metal prior to applying it. Since this rifle is totally devoid of oil at the moment, I'm going to smother it in Eezox after it cures a day, and this way that oil will really get down into the pores of the steel. YeeHA.
 
#26 ·
A note on carding the metal. After the boil, there is a velvet layer of black dust on the steel that is the residue from the change from red rust to dark blue. In order to remove it, you use either a soft wire wheel, or a soft stainless wirebrush. Both have to be degreased completely! Without any pressure you simply buff off the loose stuff and then recoat with the rust-causing chemicals. Wait the three hours or so, and boil again, repeating till the finish won't turn red anymore. Let sit a day, then oil the snot out of everything including the bore.