I'm usually down in the Mossberg forum or the Hunting forum, but I just relined a Stevens "CrackShot" for an RFC member and I kind of took a liking to the old Stevens single shots. I particularly like the under-lever falling block designs, but I didn't want to alter a nice rifle, so I was looking for a beater!!! I think I found it. Well I just won this old Stevens on GB with the express intent of relining it to 17Mach2. A bit rough and they no longer make 32 rimfire ammo so at least I will be turning an cool old rifle into a functioning cool old rifle in a current caliber!!! I suspect it will make a superb squirrel getter!!! At least that is the intention!!! These are the pictures from the GB auction, so you can get an idea of the starting point.
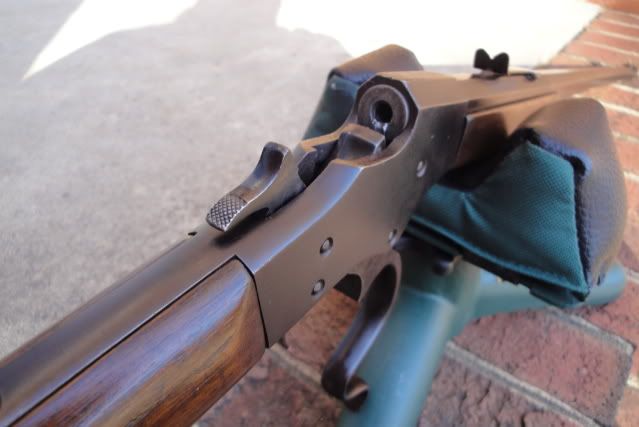
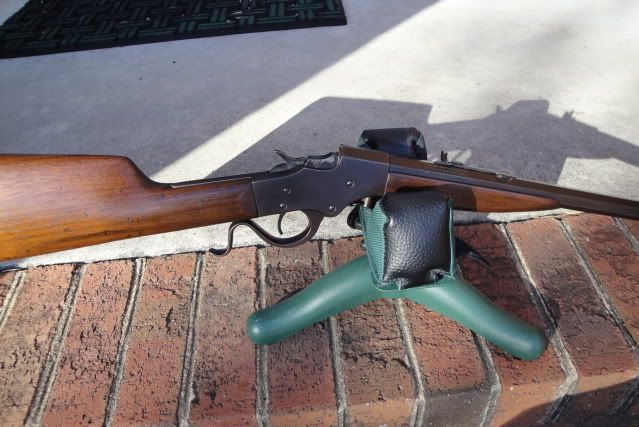
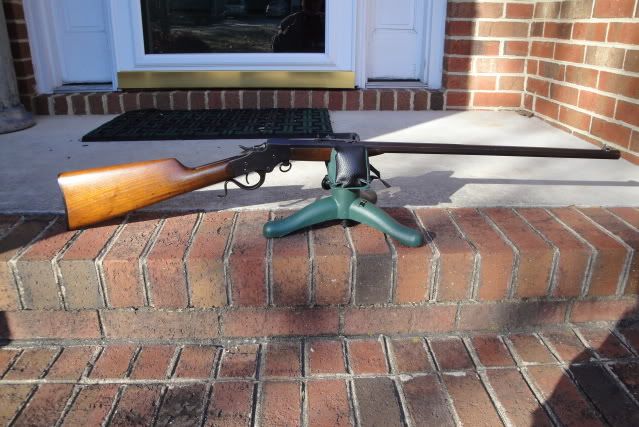
![Image]()
![Image]()
![Image]()
Here is the description posted by the seller...
God Bless, Frank.
Well I just won this old Stevens on GB with the express intent of relining it to 17Mach2. A bit rough and they no longer make 32 rimfire ammo so at least I will be turning an cool old rifle into a functioning cool old rifle in a current caliber!!! I suspect it will make a superb squirrel getter!!! At least that is the intention!!! These are the pictures from the GB auction, so you can get an idea of the starting point.


Here is the description posted by the seller...
Once I get it into my hands I will need to evaluate it and see if I can actually do what I want. Pretty sure that I can, I will just need to apply a large amount of TLC and patience to make it happen!!! I know a fellow down in Kentucky that makes custom barrel liners so it looks like I may need to contact him for a larger diameter liner than is standard for 22 rimfires. We'll see, I think this one will need a full make-over before I will call it done!!!.
God Bless, Frank.