Rimfire Central Firearm Forum banner
  • Whether you're a greenhorn or a seasoned veteran, your collection's next piece is at Bass Pro Shops. Shop Now.

    Advertisement

Bedding Pressure Pad

7.4K views 23 replies 7 participants last post by  DrGunner  
#1 ·
All, going to add a pressure pad ahead of the action screw.
If I understand the desired end result, the pad should not be exerting any upward pressure on the barrel when I tighten everything down; essentially just support and nothing else, otherwise I am introducing stress into the equation.
Correct?
 
#2 ·
Correct- kind of. Below is info I posted some years back about free float vs pressure pads and my method for determining the optimum position and size of the pad-

Hope this helps-

DrGunner

Free Float vs Pressure Pad

If you have a free float, test shoot it first. Then skip down to the section describing testing with pressure pads.

And if you have contact between the barrel and stock, test shoot it first.

Then to create a free float for testing, put a thin washer or stack some aluminum tape under the front of the receiver surrounding the takedown screw area in order to elevate the front slightly and float the barrel. Then you can test it in that configuration without changing anything.

If it shoots better with the shim under the receiver, then sand out any contact areas in the barrel channel creating enough space for a free float. IMO, a dollar bill space is insufficient. I prefer one or two business cards, depending upon thickness but the rule of thumb I use is one business card for rimfire, two for centerfire. You are not creating space to tame horrendous barrel whip, but the amount that a stock can expand and contract with moisture and the amount of flex present when shooting off a bipod mounted to the front of the foreend can be enough to make a difference.

If it shoots better with contact between the barrel and stock, then the next stage of tuning will involve testing barrel contact with a pressure pad. I prefer slices of bicycle inner tube, of varying thicknesses. I make three, one of them 1 inch long, another 2 inches long, and another 3 inches long. Work with the one that is 2 inches long, and mark out your barrel channel in 1 inch increments. Start with the pressure pad right at the receiver, test shoot and then move it forward 1 inch, test shoot apply, lather, rinse, repeat. Once you find the "sweet spot", try the 1" and 3" pads at the same spot. Pick the best of the three, then work forward and back in 1/4" increments to fine tune. When that's done, you will have found what I nickname the rifle's G-spot. Then you just need to experiment with different size, thickness, and density of material before committing and gluing something in place. I prefer to use thin double sided adhesive tape to hold pressure pads in. Glue and epoxy can stiffen the pressure pad and change its properties.

It has been my experience that MOST, but not ALL .920/Bull barrels shoot better with a free float- which requires a rear tang or other hold down to achieve.
As a general rule, those bull barrels that do shoot better with a pressure pad usually perform best with the pressure pad very close, if not right against the takedown area/receiver. I have free floated many 20-21" .920 barrels weighing 3-4 lb mounted with a slip fit in all manner of receivers and have never seen the "weight of the barrel deform the receiver"...
I have seen droop induced by over tightening the V Block screws- one good remedy to prevent this is to use a Gunsmither Block which creates a straight pull.
It also helps to use a proper inch/lb torque wrench and torque them to 12-15 inch/lb MAX.

I have also seen droop in a rifle that had a sloppy fit between the barrel stub and counterbore in the receiver- the result of an out of spec stub in two cases and counterbore on a receiver twice. I have always been able to remedy that problem with Loctite 603.

My preference is the interference fit provided by the Kidd receivers. I use the heat/cold process and have never had a problem putting one together or taking one apart.

In my experience most Taper/Sporter profile barrel shoot best with a pressure pad, the distance from the receiver varies greatly but as a general rule of thumb, heavier taper and varmint barrels usually do best with the pressure pad about 4-6" from the receiver. Standard taper and pencil barrels also vary but in general, my experience has shown that they do best with the pressure pad farther away from the receiver, towards the end of the stock.

I do not claim this process to be "RIGHT", just what works for me.
There are exceptions to every rule.


DrGunner
 
#3 ·
I have read DrGunners quote from his past thread many times in the past. It contains a lot of great information, as all of his threads do. :bthumb: It was one of the threads that got me started using barrel support.

I've been experimenting with support / pressure pads for about 2 years on a few guns, and tried many approaches .
One problem that I have found when testing with inner tube is getting the right thickness to get contact / slight pressure, without going overboard. That is because depending on your piece of inner tube, it may be .040. The space between your stock , and barrel is undetermined . Suppose that space is .050. In that case two layers of inner tube would give you .030 of pressure exerted, and I have found that to be too much. For me .005- .015 of pressure has worked best.
To control this you can add a few layers of aluminum tape under the one layer of inner tube to build it up.

I did come up with a way of measuring the space between the barrel and the stock, that helps remove that unknown. It may not be the most accurate, but it will get you close. You'll find it in the first post of this thread. http://www.rimfirecentral.com/forums/showthread.php?t=948377
 
#9 ·
I have read DrGunners quote from his past thread many times in the past. It contains a lot of great information, as all of his threads do. :bthumb: It was one of the threads that got me started using barrel support.

I did come up with a way of measuring the space between the barrel and the stock, that helps remove that unknown. It may not be the most accurate, but it will get you close. You'll find it in the first post of this thread. http://www.rimfirecentral.com/forums/showthread.php?t=948377
Thank you Dr Gunner. This post comes at just the right time to help me out. :Blasting_

Oh, BTW, I was able to measure the space between barrel and stock by stacking business cards and paper until just enough pressure to tighten the stack with screws fully torque down.

I have to say, this is a great forum. Not cornball cliche, it really is.
Hawkeye & fourbore - thanks for the kudos- all I've ever done is learn bits and pieces here, then taken a common sense approach and scientific method to document my own experiences and results. I really owe everything I know to this community and my interactions with it.

& Hawkeye- I like your method of measuring barrel channel spacing/ pad thickness!

DrGunner

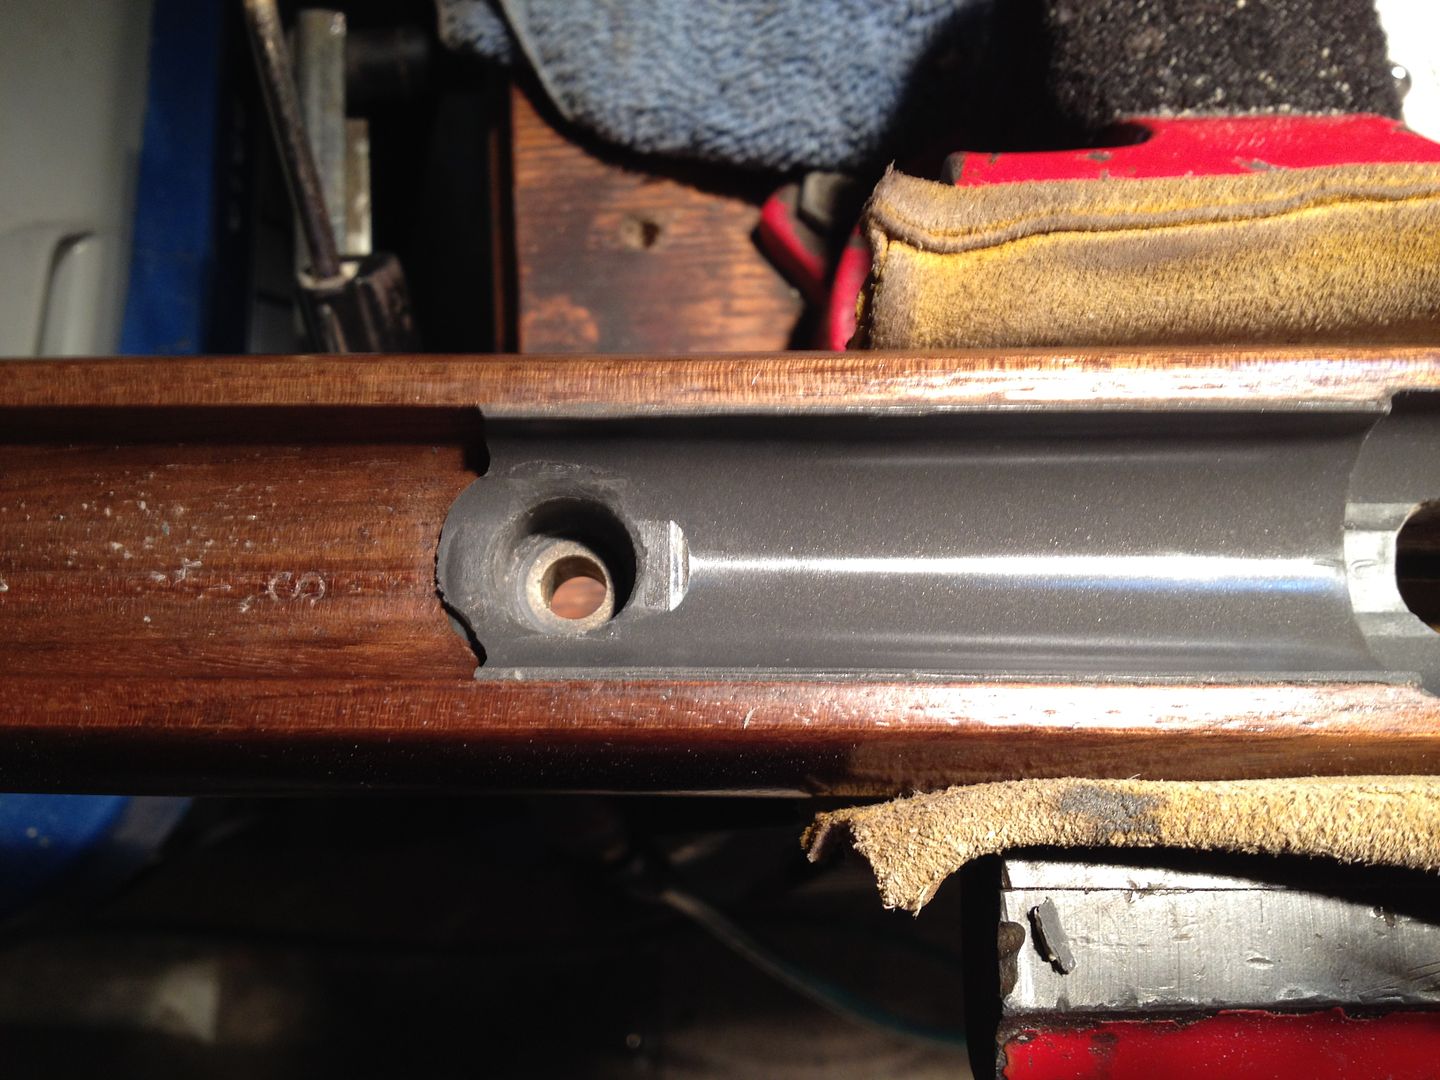
Got it ready for actually adding the pressure pad.
Couple questions:
With the permatex gasket stuff, will typical release agent work? I am using the natural shoe polish.

Also I've got about 3.5" of length to work with. Should I create a pad that full length to start with? I am planning on doing the "gasket material on top of blue tape" thing so I can move it around.
Nedsled-

As I posted, I always make 1", 2", & 3" pads. I START with the 2" and find the sweet spot. Then I try the 1" & 3" at that location. Once I've determined which length works best, I move it forward and back in 1/8" or 1/4" increments to fine tune.
I use a tiny square of thin cellophane type double sided adhesive tape to hold the test pieces in place while testing. Once I have the proper length and fine tuned position, I affix that entire piece with double sided adhesive. I tried all types of glue and found that WAY too many of them change the properties of the pressure pad as they dry, by hardening, shrinking or chemically stiffening the rubber.

Kiwi Neutral should provide good release properties for any adhesive if applied properly- i flame melt it and apply as a liquid, them gently buff to a haze.

Hope this helps-

DrGunner
 
#4 ·
Thanks guys, working on this now.

The stock is a Titan so given that it is a molded I first need to fill in the channels.

I filled in the first 2 compartments with JB Weld Steel Stick up to a certain level.

Then, since I want this pressure pad to not be permanent I used some double sided tape (which is probably a bit over 1/16" thick) to build up the circumference on the bottom part of the barrel, and am building up a bed of JB Weld to THAT on top of the compartments I filled in.

This way I won't have a permanent JB Weld bed for the barrel after the double sided tape comes off (there will be a free float between the barrel and JB Weld the thickness of the tape). I will use the Permatex gasket maker to do the pad(s), and use the blue tape trick to move around, etc.

Going slow on building up the JBWeld bed so it does not squish past the modeling clay dams onto the VBlock; probably take 2-3 more applications to get that done. Really I could probably do the gasket bedding now but I want the JBWeld to look pretty and symmetrical. I figure the symmetrical part might be important as well since you are now adding the stock to the barrel equation and some level of side to side consistency could be important. But mainly it's so it looks pretty (even though I will be the only one to ever see it).
 
#5 ·
Thanks guys, working on this now.

The stock is a Titan so given that it is a molded I first need to fill in the channels.

I filled in the first 2 compartments with JB Weld Steel Stick up to a certain level.

Then, since I want this pressure pad to not be permanent I used some double sided tape (which is probably a bit over 1/16" thick) to build up the circumference on the bottom part of the barrel, and am building up a bed of JB Weld to THAT on top of the compartments I filled in.

This way I won't have a permanent JB Weld bed for the barrel after the double sided tape comes off (there will be a free float between the barrel and JB Weld the thickness of the tape). I will use the Permatex gasket maker to do the pad(s), and use the blue tape trick to move around, etc.

Going slow on building up the JBWeld bed so it does not squish past the modeling clay dams onto the VBlock; probably take 2-3 more applications to get that done. Really I could probably do the gasket bedding now but I want the JBWeld to look pretty and symmetrical. I figure the symmetrical part might be important as well since you are now adding the stock to the barrel equation and some level of side to side consistency could be important. But mainly it's so it looks pretty (even though I will be the only one to ever see it).
It looks like you are on the right track.
You may already know, but just in case I'll add two things.
1- If your using the Permatex, don't torque your action screw when molding the pad. Just barely snug it up, until you feel contact.
2- Cut the pad so that it is in the 4 oclock to 8 oclock area of the channel, or slightly smaller. You don't want it coming higher and applying opposing pressure from the sides.
 
#6 ·
Got it ready for actually adding the pressure pad.
Couple questions:
With the permatex gasket stuff, will typical release agent work? I am using the natural shoe polish.

Also I've got about 3.5" of length to work with. Should I create a pad that full length to start with? I am planning on doing the "gasket material on top of blue tape" thing so I can move it around.
 

Attachments

#8 ·
I have always used parchment paper between the barrel, and Permatex. Using release on the side of the paper that contacts the Permatex. I have had a few that the paper would not release from the Permatex. Colder temps, and high humidity seem to cause it, but a pad will work the same weather it still has paper on, or not.
I never wanted to take the chance of the Permatex staining the blueing, in it's raw uncured form.

I would use plumbers putty to make a small dam at both ends, like I used in the back in the following pic of one tat I made for my CZ. Just to be safe I would tape around the V block, and use release / putty / tape anywhere else. I have had small amounts jump a dam into areas where I had Johnsons / Kiwi applied , and it peeled right off after it cured.

Image

You could make the full length and try it. Then if you want, you can cut it into 2, or 3 , then put one or all of them back in.
 
#7 · (Edited)
Thank you Dr Gunner. This post comes at just the right time to help me out. :Blasting_

Oh, BTW, I was able to measure the space between barrel and stock by stacking business cards and paper until just enough pressure to tighten the stack with screws fully torque down.

I have to say, this is a great forum. Not cornball cliche, it really is.
 
#11 ·
I found some small new/old tractor inner tube that measures 70/1000. I have a 40/1000 gap. If the strips are relatively thin (like that white bead above) there is no problem to compress it down to 40/1000 in the calipers. I am guessing on the amount of compression needed.

Just a though on making shims with pertax- if my tubing was thinner, say bicycle tubing, it could be backed up with some other material like card stock or any flex able shim material. One or two sizes rubber should fit about any situation. I dont see the need for the messy stuff unless it has some advantage. Is there?

I cannot wait to try this out.
 
#14 ·
So Dr. Gunner, if I understand correctly, the inner tube runs from side to side of the barrel channel, but extends the length of the barrel channel for 1", 2" or 3"? Is that correct? I'm looking at experimenting with this pressure pad idea very soon and want to make sure I've got it right. Looking at Nedsled's post with the photo, that's my impression.
 
#15 ·
Close. Yes, it runs side to side. Yes, I've installed them in varying lengths after testing what works best. AAAAND sometimes the best location is right against the receiver- in my experience, that's the best place for short stout barrels like bull barrels and heavy tapers. For sporter contours and pencil barrels, the sweet spot is often some distance away from the receiver- some even at the very FAR end of the barrel channel. I've found that the more slender the barrel, the farther from the receiver the pad needs to be for best performance. MOST of my .920 barrels are fully free floated, and most of my sporters have a 1-2" pad that is somewhere between 1/3-2/3 the overall distance from the receiver to the end of the barrel channel. This all gets even weirder with my CZs, which have a barrel lug in a dovetail slot about 1/3 the distance between the breech and end of the barrel channel. I tested them extensively, and could not find a spot that works better than the location of that lug, so I pillar bed the lug and bed the action and barrel, up to and including the lug, ending just past it.


Unfortunately, I don't have any pics of the simple 1-2" mid-channel pads. Next time I have one of those rifles apart, I'll snap some pics for the bucket to share here.

Hope this helps-

DrGunner
 
#16 ·
Sorry Dr.Gunner, I should have mentioned it's for a 10/22 and it's a factory stainless deluxe sporter barrel that started at 22" and I have had cut to 16.5" and threaded for a suppressor, so it's a pretty lightweight, tapered barrel.

Your post does help and I think I understand now. On to the experimentation...
 
#17 ·
Sorry Dr.Gunner, I should have mentioned it's for a 10/22 and it's a factory stainless deluxe sporter barrel that started at 22" and I have had cut to 16.5" and threaded for a suppressor, so it's a pretty lightweight, tapered barrel.

Your post does help and I think I understand now. On to the experimentation...
I'd start with a 1" pad, initial testing about 4-6" from the receiver, go forward and back from a staring point maybe 5". Be sure to test with ammo that you know to
be consistent and have plenty on hand. I prefer SK RM. I draw a ruler on masking tape in 1/4" increments and line the barrel channel with it. Makes it easier to keep track of data.

Good luck, let us know what you find. Most of the 16" tapers I've done in the past have 1" pads 6-7" from the V Block.

Also, test with your suppressor before you commit...

DrGunner
 
#19 ·
With Permatex, I wonder if you’d have better results if you left it exposed to
the air for some time before installing the action?

Just thinking on it, I’m pretty sure the reaction that sets the silicone is catalyzed by exposure to oxygen. If you have a pretty thick layer over the length of the barrel channel, would the center part not act like it does in the tube?

Just wondering.
 
#20 ·
With Permatex, I wonder if you'd have better results if you left it exposed to
the air for some time before installing the action?

Just thinking on it, I'm pretty sure the reaction that sets the silicone is catalyzed by exposure to oxygen. If you have a pretty thick layer over the length of the barrel channel, would the center part not act like it does in the tube?

Just wondering.
I have one gun ( Lily Belle ) that hasn't tried your games yet. :D I got a new scope on the way, and I would like to try another pad before she makes an attempt.

I'm going to make another pad soon. I have never waited to put the action in, to see where the limit is on working time ( oozability ). I know that it skins over in about an hour. So I'm guessing 45 minutes may be that window. I'll check it out on the next one, and see if it has any affect on curing.