

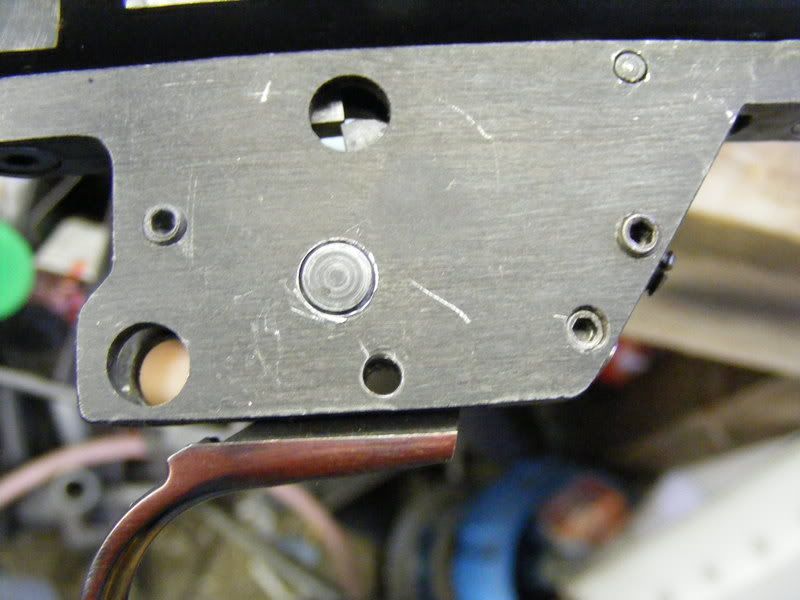
well i started out tinkering with my 82G trying to get the trigger down to a real benchrest type wieght. at least single digit ounces. so i started honing and grinding and promptly ruined my trigger to the piont of non function. the sear was no longer tall enough the engauge the striker properly. so with my trigger basicly trashed i sharted looking for upgrade ideas. i looked at Jard triggers, Annie triggers, Remmy triggers, anything to get back up and running. nothing would adapt without extensive modification of either the gun, the trigger or both. no chance of upgrade to be had i went in search of parts to get my stock trigger back up and running. as luck would have it there is a bunch of 82 parts FS on GB right now. so i figured i can get a replacement and with my parts being screwed up anyway it was time for little experiment. what happened was i ground off the bottom of the sear so that i could get to the engaugement surface to polish it. while i was doing this i went just a bit too far. first thing i did was to peen the sear to get it tall enough to reengauge the striker. so i heated the top and peened and heated and peened till it was .040" taller. reground and polished the top profile back to spec. now it would reengauge. it was working but still only around 1# standard fare for 82's. then i started looking at the trigger return spring and the travel adjustments. i switched the trigger return spring to the top hole and the OT stop to the bottom. then i switched the stiff factory spring for a softer spring. i used a trigger return spring out of a 10/22. this got me down to 13 oz. better but still not good enough for what i wanted. frustrated i sat down for break. while i was sitting i was looking at the replacement pats and got to looking just exactly how everything was laid out inside the group. basicly the trigger is a lever operating on a fulcrum. the closer to the load the fulcrum is the easier it is to move the load. well the fulcrum on the 82G trigger is in the worst possible place to work as a lever all the way at the bottom of the trigger group. easy fix move the fulcrum up closer to the load. i set the pins out side and mocked up the hammer and sear on the outside so i could get an idea of where to put the new pin. once i located where i thought the hole should be. i installed the trigger back into the housing and locked it down with the adjustment screws. then i drilled a new hole with a carbide bit. it has to be carbide. nothing else will cut the trigger metal. i went to 1/4" which is maybe a bit big BUT it works perfectly. if i did another one i would use a smaller bit and pin. the hole is .325" up and .150" to the rear. all measurements are center to center. after this simple pin relocation. trigger pull had to be adjusted UP to 2 oz. it was VERY SCARY light when i first installed it. i'm sure it is a combination of all the things that i did to get it to where it is but it's there. a real 2 oz. trigger for my 82G.
![Image]()
![Image]()

") thanks for posting the mod! mw
thanks for posting the mod! mw


