

Wanted to add a disclaimer.
Note: First, any work performed on your rifle is at your own risk, I'm posting this as a guide to what has worked on mine. Your results may vary depending on the condition of other parts (hammer, springs etc.). Any work performed on your rifle will of course void the warranty as well. You should also be aware that any modifications to the sear and/or hammer can result in an unsafe condition.
I decided to put all the pictures and instructions of my trigger work in one place.
Using a crude, weights & hook style pull gauge, the trigger pull on my 60 was over 7-lbs even after a few thousand rounds fired, it also had pre-travel, a little sear creep and some over-travel. Not the worst trigger ever but after shooting my other rifles and handguns with triggers 4-lbs or less it was time for a change.
I tried adjusting/bending the springs, (sear, trigger & disconnector) and the results were okay but the rifle was unreliable, especially after 100-150 rounds. So I replaced all the springs and looked towards the sear and hammer.
Before you get started, I suggest buying a new sear if you decide to try this method, you can use it as a guide to gauge your work and it will be good insurance if you damage the original sear. Same thing goes for the hammer if you make any changes to it other than just polishing.
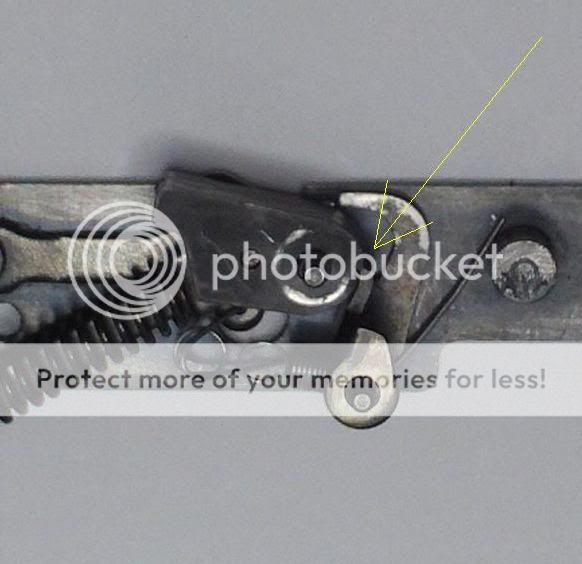
In photo #1 you'll see a toolmaker's vise with a Marlin 60/795 sear clamped in and the ultra-fine triangle shaped stone on the sear surface using the left edge of the vise as a guide. I put a piece of clear packing tape on the vise where the stone is riding to keep the stone from grinding on the vice. This stone can be used to polish the hammer hook on the hammer.
When clamping the sear, you want to keep the factory sear angle flat, level and parallel with the top surface of the vise. The end result we be a new sear angle that mates to the hammer cleanly.
The height of the sear in the vise will change the angle of your work, as you raise the sear in the vise (yellow arrow) your trigger will get lighter because you're reducing the angle of hammer engagement. Be careful, if you raise the sear too high the hammer hooks will not hold. The rifle may become full-auto if the hammer fails to lock.
#1
![Image]()
Photo #2 shows me taking a height measurement of .305" with the depth gauge on a set of Brown & Sharpe 6" dial calipers. The calipers you see in the background are some 4" china knock-offs, they work if I keep them adjusted, but the Brown & Sharpe are much nicer.
#2
![Image]()
Photo #3 shows the direction (red arrow) I used to cut the sear, the only reason I chose this direction was because of the narrow stone. It was all I had in fine or ultra fine. If you have a stone wider than the sear surface you can cut in the direction of the yellow arrows.
#3
![Image]()
Photo #4-A is a crude drawing of what the sear looked like before (left) and after (center). You do not have to cut a new angle on the entire sear surface area, the hammer hook is not deep enough to use the whole surface. Cutting just half was more than enough on my rifle. Photo's 4-B through 4-D are updated pics of a freshly worked sear.
The far right image shows where the face of the sear was reduced with the same stone. This is only recommended if you have excessive sear creep, Marlin uses less than a third of the sear surface (photos #5 yellow arrow, & #6) to start with and if you remove too much the sear is worthless. All I removed was about .005" from this area.
#4-A
![Image]()
#4-B
![Image]()
#4-C
![Image]()
#4-D
![Image]()
In pictures #5 and 6 you can see the sear and hammer are fully engaged, it looks like only about 25% of the sear surface is catching the hammer hook.
#5
![Image]()
#6
![Image]()
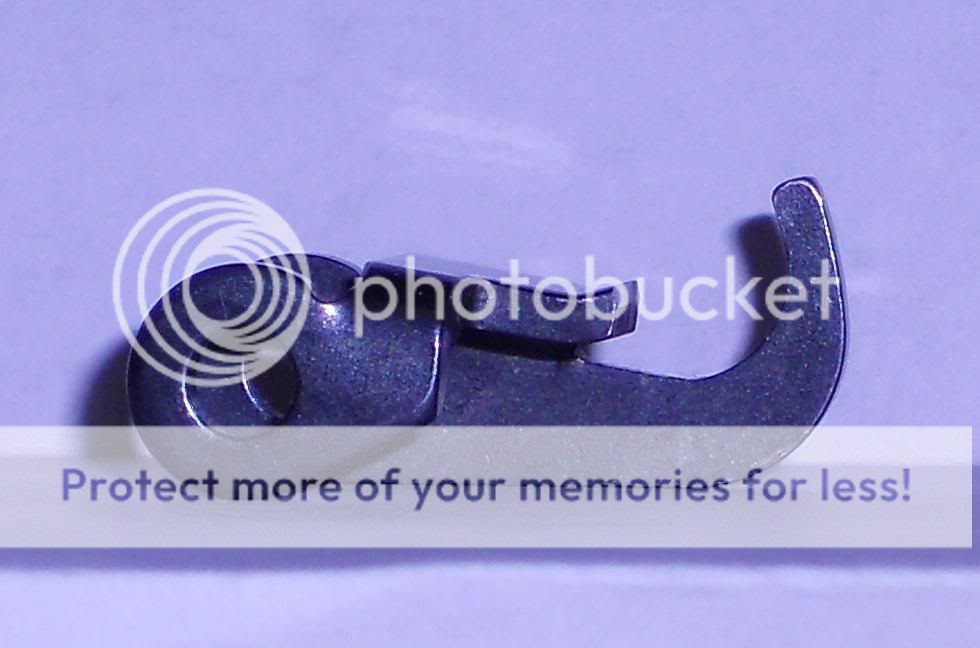
Image #7 is another crude drawing, this is the hammer profile.
There wasn't much to do with the hammer, polishing the sear engagement surface was about it. You can reduce sear creep by stoning the nose if it's needed, but work slowly, about .002-.003" then test fire. If you remove too much the hammer will not lock.
Do not remove any metal from the area below the hammer hook, if you do this will increase the amount of sear creep.
#7
![Image]()
The picture below shows the results of the trigger pull gauge after the work was finished. It took four sessions with the stone and test firing at the range to achieve the sub 3-lb trigger pull.
Using the tools above your first attempt should give you a trigger pull just over 4-lbs, that's what mine was. I just raised the sear a bit, worked it again, then test fired until I got the 2-lb 10-oz trigger pull seen below. Just work slowly and test fire the rifle each time you change the sear.
Unfortunately I didn't have the trigger pull gauge before the sear work, so I don't have a before trigger pull image. I'll order a new sear and hammer soon to install and get a factory, unmodified reading posted later.
![Image]()
Currently my Model 60 has a DIP target trigger, the new angle on the sear, the hammer and sear matting surfaces are polished with 1200 grit sand paper and I shaved about .005" off the face of the sear. (see pic #4 far right, red image) The springs are less than 6 months old, most are factory replacements with the exception of the J&P hammer and recoil spring kit.
The result is a trigger that's smooth, breaks clean just under 2-lbs 10-oz and has zero pre-travel thanks to the set screw in the DIP trigger. The over-travel was never much of an issue with me, but if you would like to reduce yours the DIP trigger guards are drilled and tapped for a trigger stop screw or you can drill and tap you factory trigger guard.
Tool list used for the sear work detailed above, plus the tools needed to break down the action:
Norton ultra-fine triangle shaped stone (any fine or ultra-fine stone will work)
Set of dial caliper, 4" or 6" is fine
Lyman trigger pull gauge, 0-12-lbs part #7832248
One 2" tool makers vise, can be purchased from e-Bay or Shars. (china knock-off, but works)
![Image]()
![Image]()
![Image]()
Note: First, any work performed on your rifle is at your own risk, I'm posting this as a guide to what has worked on mine. Your results may vary depending on the condition of other parts (hammer, springs etc.). Any work performed on your rifle will of course void the warranty as well. You should also be aware that any modifications to the sear and/or hammer can result in an unsafe condition.
I decided to put all the pictures and instructions of my trigger work in one place.
Using a crude, weights & hook style pull gauge, the trigger pull on my 60 was over 7-lbs even after a few thousand rounds fired, it also had pre-travel, a little sear creep and some over-travel. Not the worst trigger ever but after shooting my other rifles and handguns with triggers 4-lbs or less it was time for a change.
I tried adjusting/bending the springs, (sear, trigger & disconnector) and the results were okay but the rifle was unreliable, especially after 100-150 rounds. So I replaced all the springs and looked towards the sear and hammer.
Before you get started, I suggest buying a new sear if you decide to try this method, you can use it as a guide to gauge your work and it will be good insurance if you damage the original sear. Same thing goes for the hammer if you make any changes to it other than just polishing.
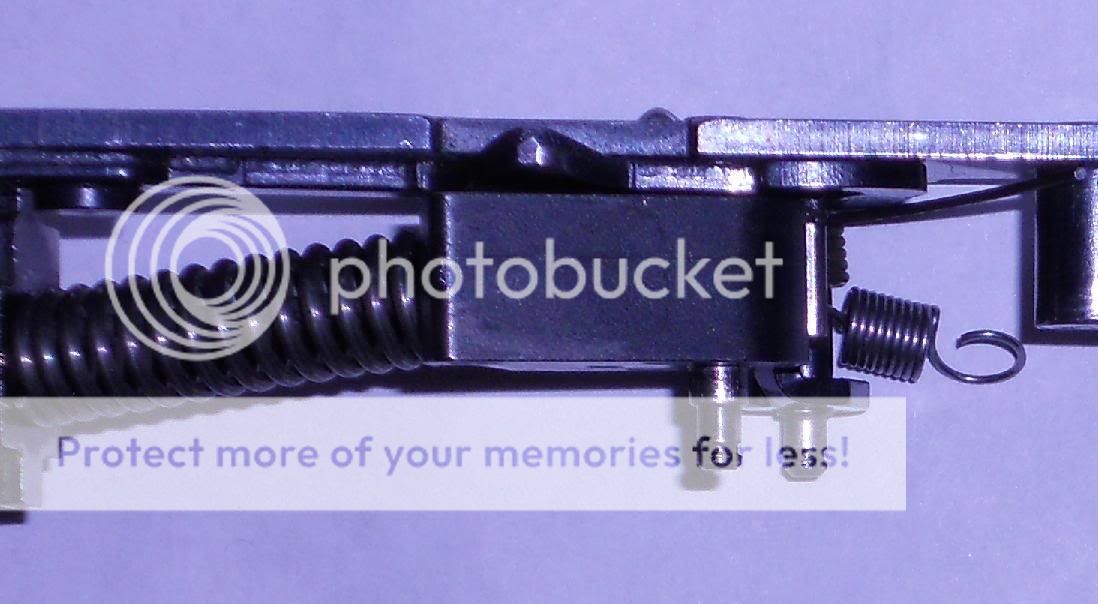
In photo #1 you'll see a toolmaker's vise with a Marlin 60/795 sear clamped in and the ultra-fine triangle shaped stone on the sear surface using the left edge of the vise as a guide. I put a piece of clear packing tape on the vise where the stone is riding to keep the stone from grinding on the vice. This stone can be used to polish the hammer hook on the hammer.
When clamping the sear, you want to keep the factory sear angle flat, level and parallel with the top surface of the vise. The end result we be a new sear angle that mates to the hammer cleanly.
The height of the sear in the vise will change the angle of your work, as you raise the sear in the vise (yellow arrow) your trigger will get lighter because you're reducing the angle of hammer engagement. Be careful, if you raise the sear too high the hammer hooks will not hold. The rifle may become full-auto if the hammer fails to lock.
#1

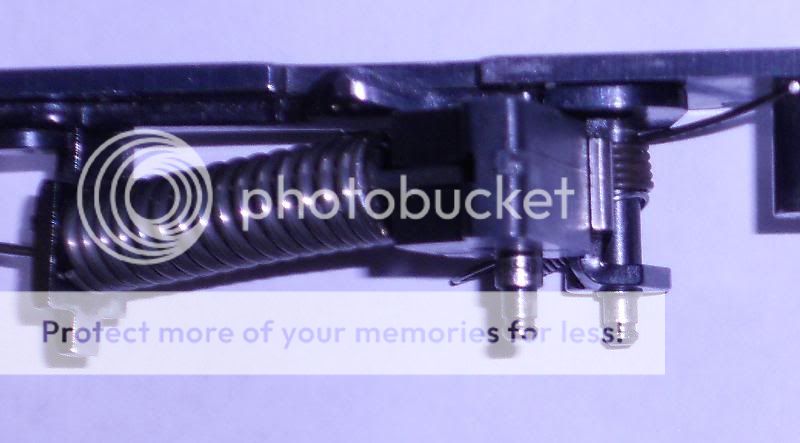
Photo #2 shows me taking a height measurement of .305" with the depth gauge on a set of Brown & Sharpe 6" dial calipers. The calipers you see in the background are some 4" china knock-offs, they work if I keep them adjusted, but the Brown & Sharpe are much nicer.
#2
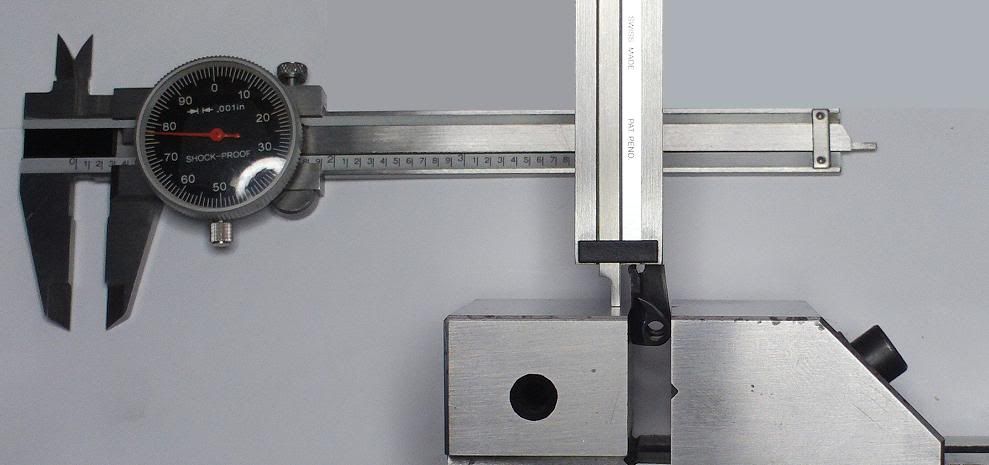
Photo #3 shows the direction (red arrow) I used to cut the sear, the only reason I chose this direction was because of the narrow stone. It was all I had in fine or ultra fine. If you have a stone wider than the sear surface you can cut in the direction of the yellow arrows.
#3
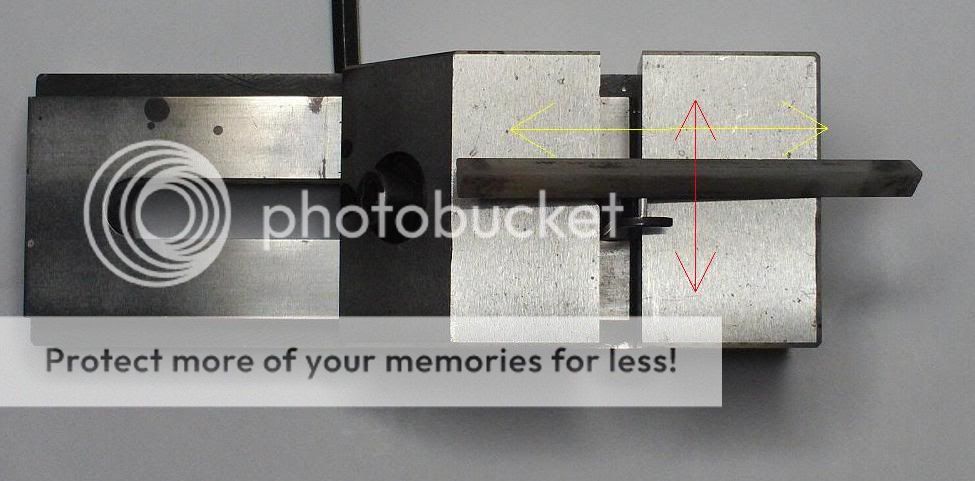
Photo #4-A is a crude drawing of what the sear looked like before (left) and after (center). You do not have to cut a new angle on the entire sear surface area, the hammer hook is not deep enough to use the whole surface. Cutting just half was more than enough on my rifle. Photo's 4-B through 4-D are updated pics of a freshly worked sear.
The far right image shows where the face of the sear was reduced with the same stone. This is only recommended if you have excessive sear creep, Marlin uses less than a third of the sear surface (photos #5 yellow arrow, & #6) to start with and if you remove too much the sear is worthless. All I removed was about .005" from this area.
#4-A

#4-B
#4-C

#4-D

In pictures #5 and 6 you can see the sear and hammer are fully engaged, it looks like only about 25% of the sear surface is catching the hammer hook.
#5
#6

Image #7 is another crude drawing, this is the hammer profile.
There wasn't much to do with the hammer, polishing the sear engagement surface was about it. You can reduce sear creep by stoning the nose if it's needed, but work slowly, about .002-.003" then test fire. If you remove too much the hammer will not lock.
Do not remove any metal from the area below the hammer hook, if you do this will increase the amount of sear creep.
#7
The picture below shows the results of the trigger pull gauge after the work was finished. It took four sessions with the stone and test firing at the range to achieve the sub 3-lb trigger pull.
Using the tools above your first attempt should give you a trigger pull just over 4-lbs, that's what mine was. I just raised the sear a bit, worked it again, then test fired until I got the 2-lb 10-oz trigger pull seen below. Just work slowly and test fire the rifle each time you change the sear.
Unfortunately I didn't have the trigger pull gauge before the sear work, so I don't have a before trigger pull image. I'll order a new sear and hammer soon to install and get a factory, unmodified reading posted later.

Currently my Model 60 has a DIP target trigger, the new angle on the sear, the hammer and sear matting surfaces are polished with 1200 grit sand paper and I shaved about .005" off the face of the sear. (see pic #4 far right, red image) The springs are less than 6 months old, most are factory replacements with the exception of the J&P hammer and recoil spring kit.
The result is a trigger that's smooth, breaks clean just under 2-lbs 10-oz and has zero pre-travel thanks to the set screw in the DIP trigger. The over-travel was never much of an issue with me, but if you would like to reduce yours the DIP trigger guards are drilled and tapped for a trigger stop screw or you can drill and tap you factory trigger guard.
Tool list used for the sear work detailed above, plus the tools needed to break down the action:
Norton ultra-fine triangle shaped stone (any fine or ultra-fine stone will work)
Set of dial caliper, 4" or 6" is fine
Lyman trigger pull gauge, 0-12-lbs part #7832248
One 2" tool makers vise, can be purchased from e-Bay or Shars. (china knock-off, but works)

 . I did take my time, and quite honestly, the trigger pull is now beautiful, but it's no longer user friendly or safe to say the least


